


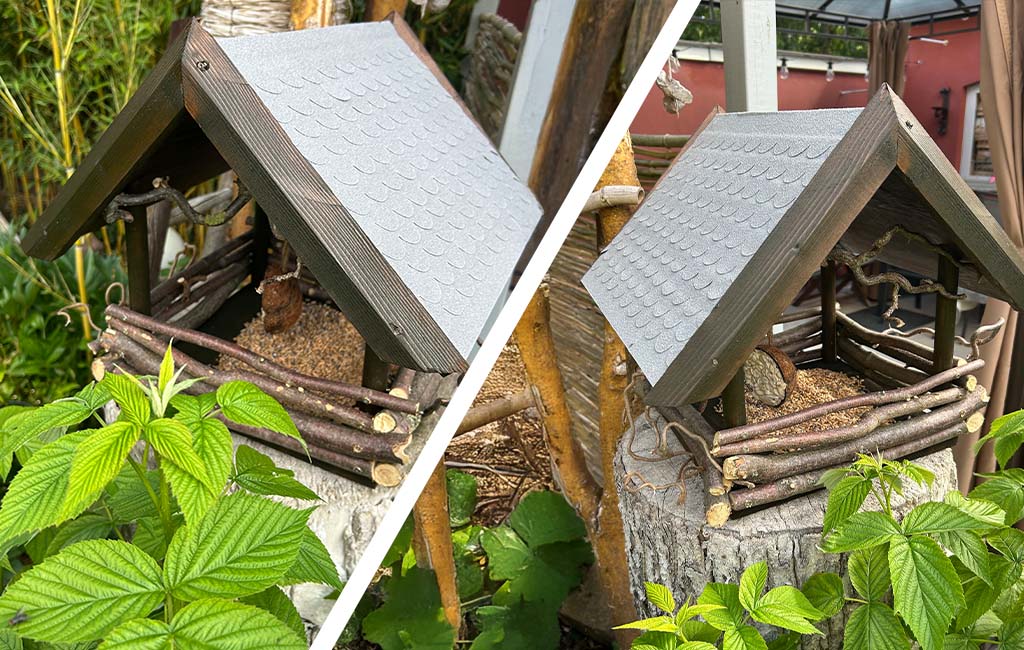
Rustic Birdhouse
DO IT YOURSELF
A birdhouse is not only a great project for DIY enthusiasts, but also a real asset to your garden. It provides birds with food and shelter and gives you the opportunity to observe nature up close.
In this blog post, you'll learn how to build your own rustic birdhouse out of branches and natural wood.
Tools and Materials
Materials
- For the base: 1 wooden board measuring 30 x 30 cm
- For the roof: 2 wooden boards measuring 40 x 30 cm and 40 x 29 cm
- 4x round timbers: 25 cm length
- Natural branches: approx. 30 – 33 cm length
- Mini shingles
- Wood stain / Glaze
- Paintbrush
- Screws
- Birdseed
- 4 Target strips (optional)
Instructions: Building the Birdhouse
Step 1: Building a base plate with supports
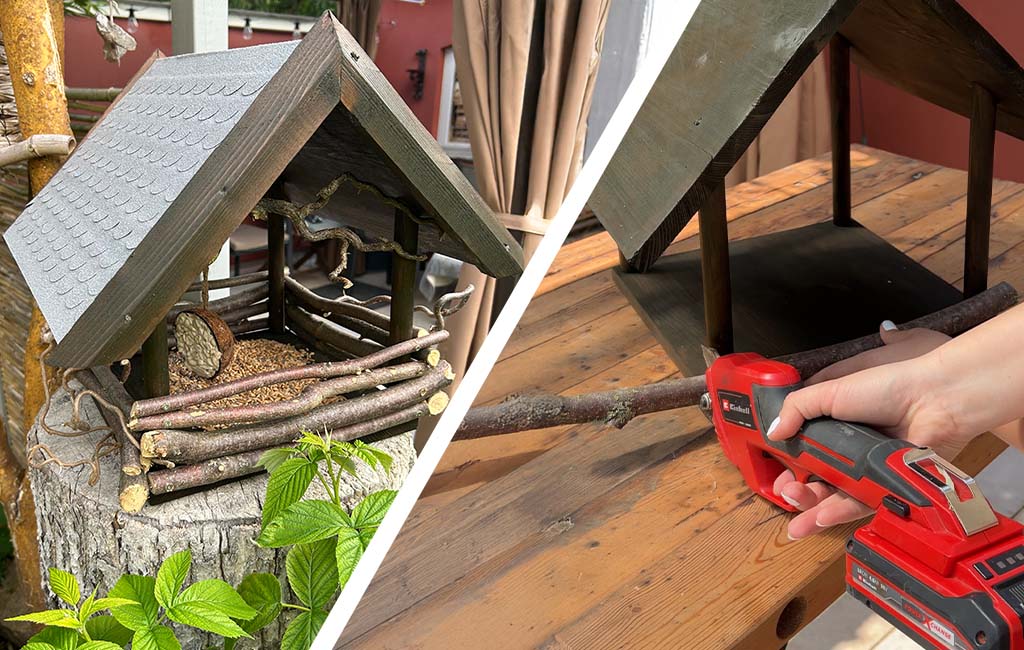
Cut a rectangular wooden base plate measuring 30 x 30 cm. Set the pull-cut miter saw to an angle of 45°. Now saw off one side of the round timbers at a 45° angle. To position the round timbers evenly, it is advisable to mark a 1 cm gap on each side of the board. I used a folding rule to measure this. Now screw the round timbers onto the base plate from below.
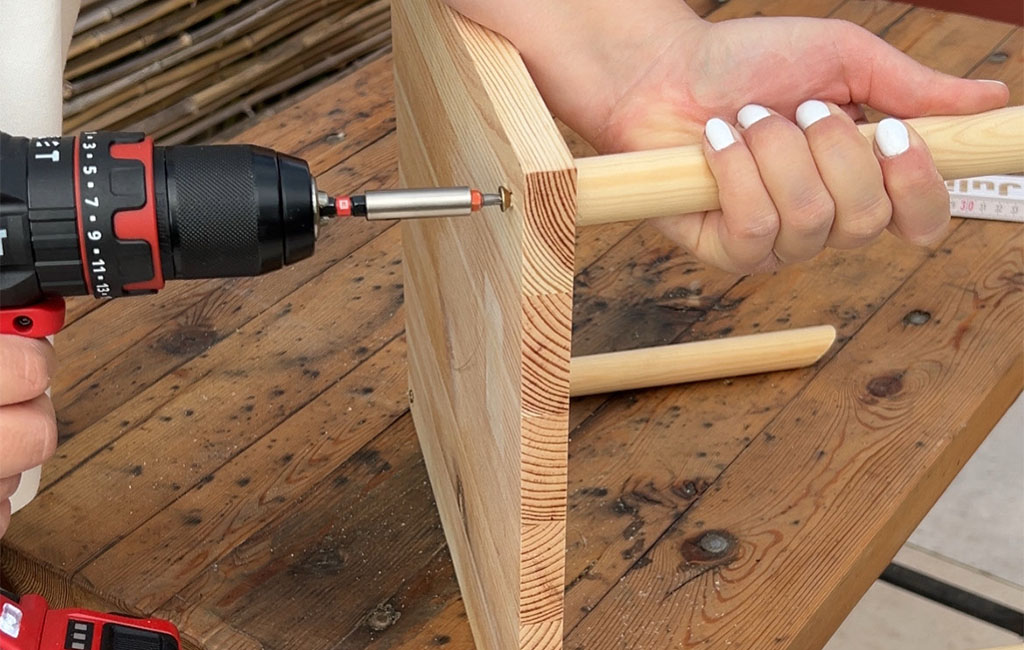
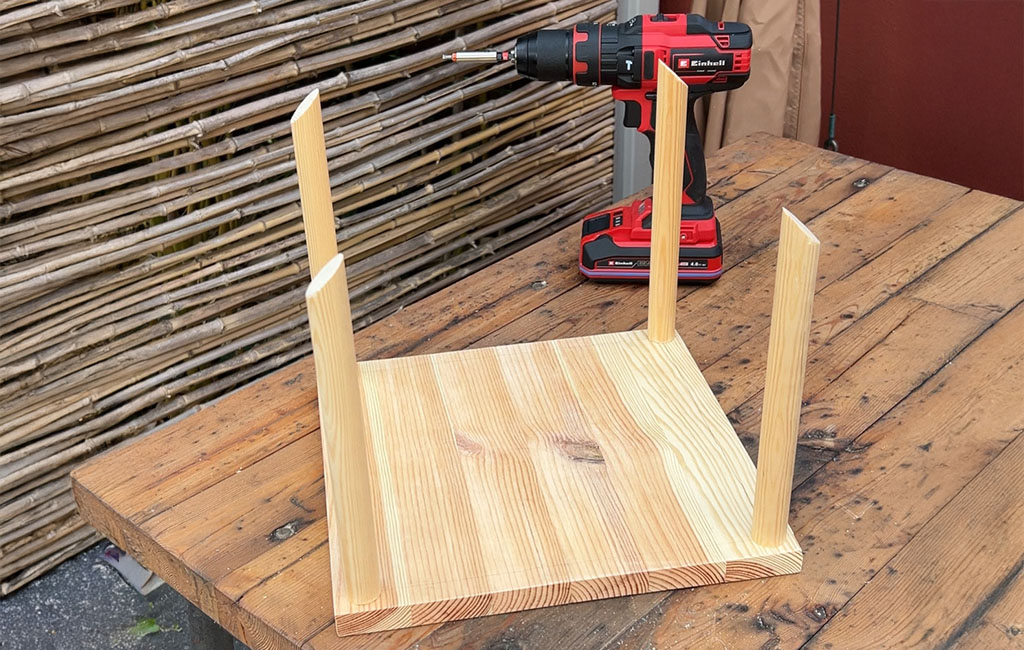
💡 Tip: It is best to pre-drill holes in both the base plate and the round timbers to prevent the wood from splitting. The round timbers will later support the roof.
Step 2: Install the Roof
I used an old shelf as the roof. This is a great way to reuse old materials and give them a useful new purpose.
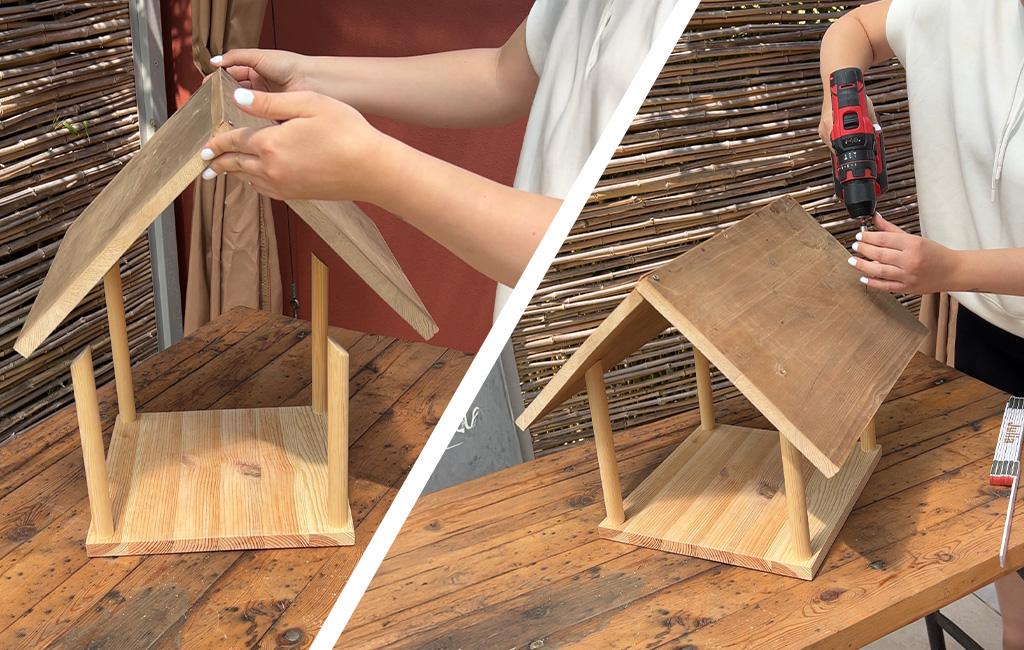
The roof panels are cut to the following dimensions: 1 x 40 x 30 cm and 1 x 40 x 29 cm. The shorter roof panel is now screwed under the longer one.
Now the roof is mounted on the round timbers using screws. Here too, it is advisable to pre-drill the holes.
Step 3: Paint the Scaffolding
The finished frame can now be painted or stained as desired and should then be sealed with a weatherproof glaze.

Step 4: Add Natural Wood Paneling
To achieve the rustic look, cut branches to the appropriate length and attach them horizontally along the edge of the floor like a small railing. The ends can also be irregular, which adds to the charm. It is best to collect the materials in nature – just make sure to use wood that is already dead.
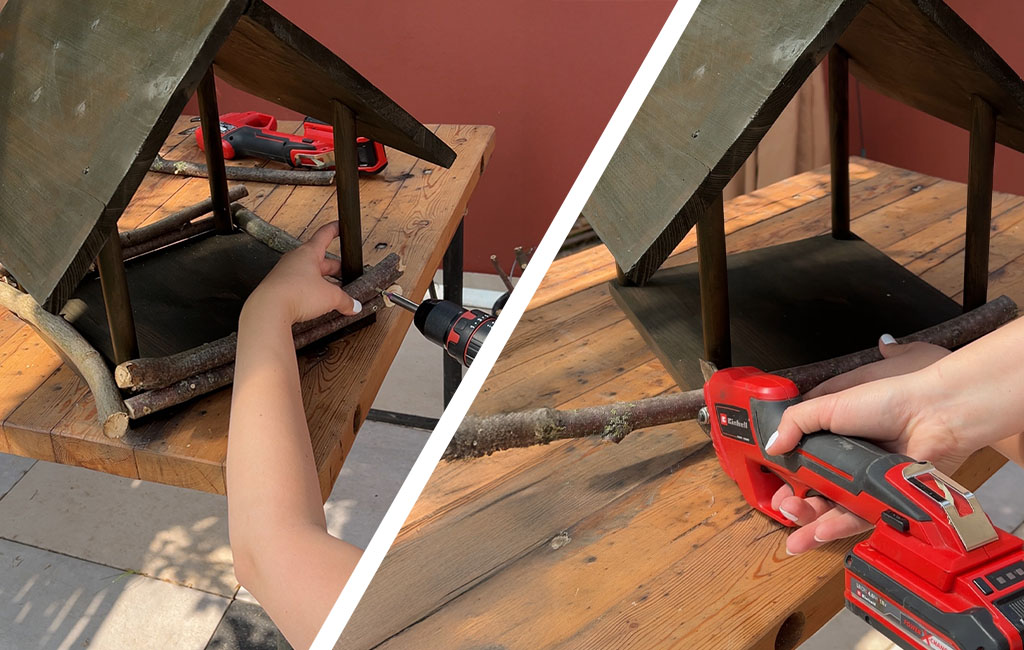
💡 Tipp: Pre-drill the holes here too! Screw in the screws carefully and slowly.
Depending on your taste, the house can be decorated further with additional branches, such as corkscrew willow.
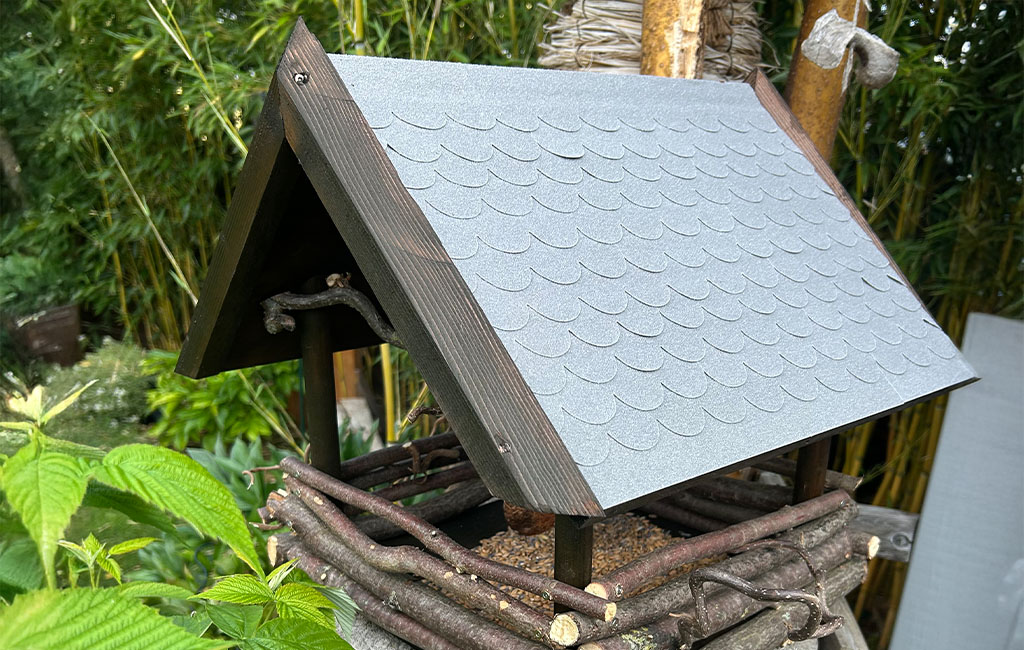
Step 5: Cladding the Roof
Self-adhesive roof shingles are suitable for roof cladding. You can attach these to the roof row by row in a staggered pattern. Start with the bottom row and stick it upside down onto the roof to achieve a straight finish.
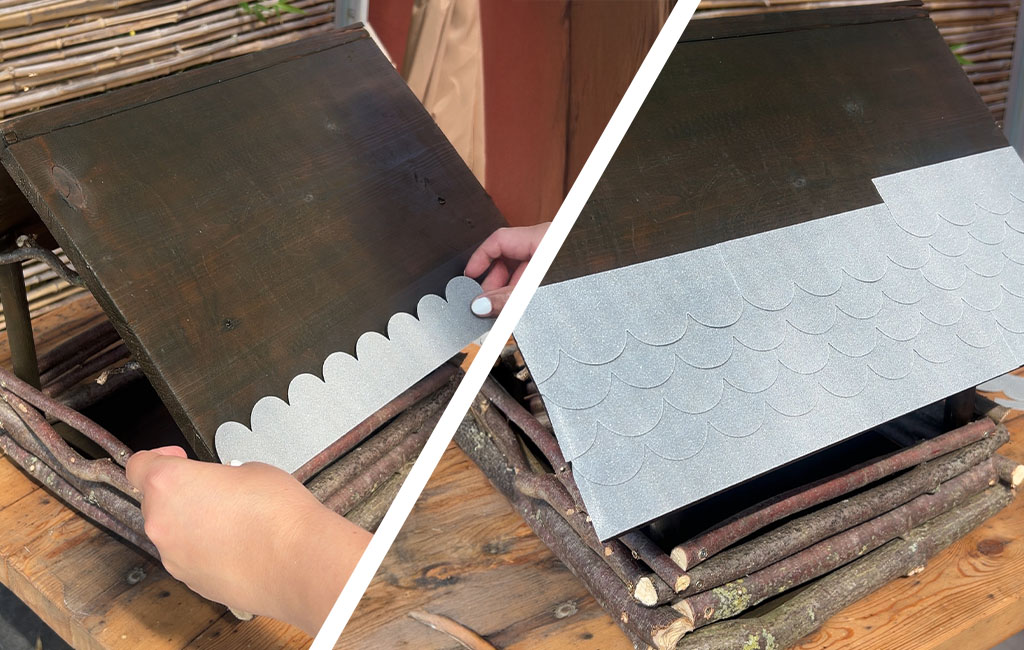
Once the roof is completely covered, decorative wooden moldings can be used to create an attractive finish. This step can also be omitted according to preference and taste.
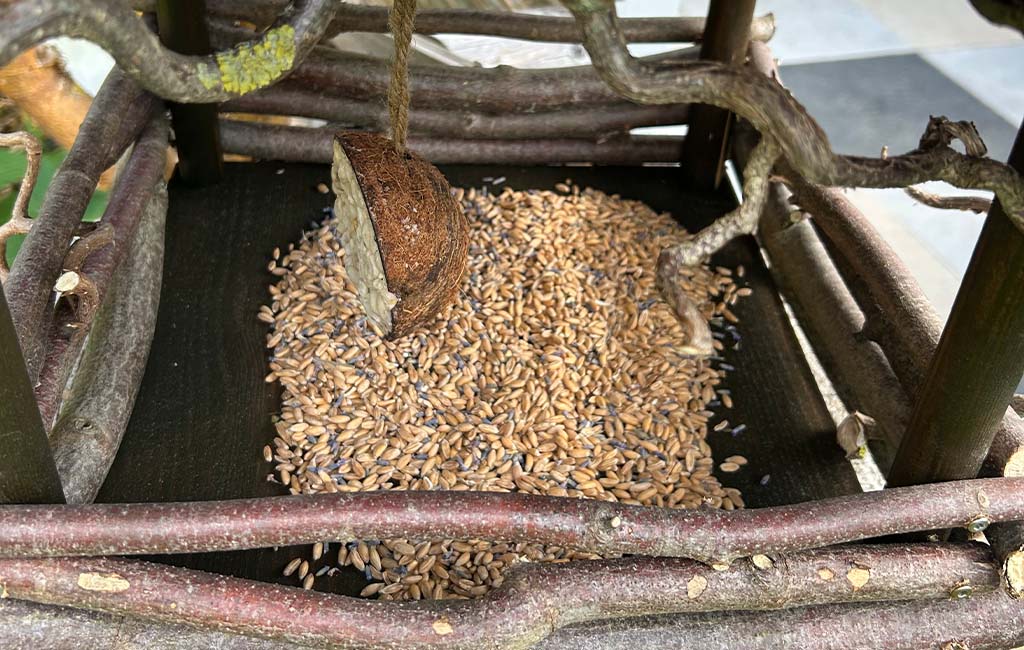
Step 6: Placing and Filling
Place your birdhouse on a tree stump or pole or hang it securely. Also, make sure to place it where it will be protected from cats or other bird predators.
Now all you need to do is fill the birdhouse with birdseed, nuts, or berries, and the first birds can move in.
Conclusion: Rustic birdhouse as an eye-catcher
A rustic birdhouse is not only functional, but also a real eye-catcher in the garden. With a little craftsmanship and natural materials, you can conjure up a cozy retreat for all birds.
We hope you have fun recreating it!
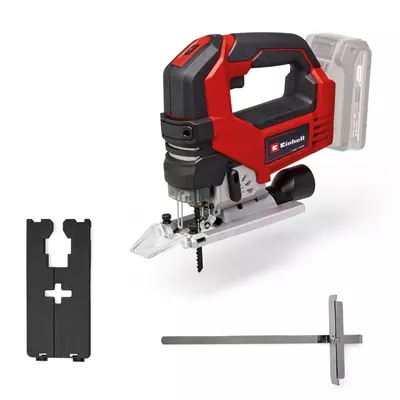
Suitable Tools for the Project
Here you'll find Einhell tools and accessories that are perfect for bringing this DIY project to life.


In this article you will learn all about:
Published on 16.09.2025
A love of decoration meets creativity – Julia from @julias_deko_home delights with heartfelt DIY ideas for the home and garden, inspiring others to get creative themselves. On her channel, she shares inspiring decor ideas and seasonal arrangements that bring warmth and cosiness to any home. With a keen eye for detail, she combines modern trends with timeless elegance. The result is a home that not only looks beautiful but also feels truly welcoming.