


DIY instructions: Easter wreath
DO IT YOURSELF
Spring not only brings longer days and warmer temperatures, but also the perfect opportunity to decorate your home with fresh, natural Easter decorations. DIY projects using materials from nature are especially beautiful – they feel light, sustainable, and unique.
How about an Easter wreath to decorate your front door or walls? The combination of natural branches, moss, and colorful Easter eggs is timeless and can be customized in many creative ways.
In this post, we show you how to create an Easter wreath from branches, moss, and dyed eggs as a decoration for the Easter holidays.
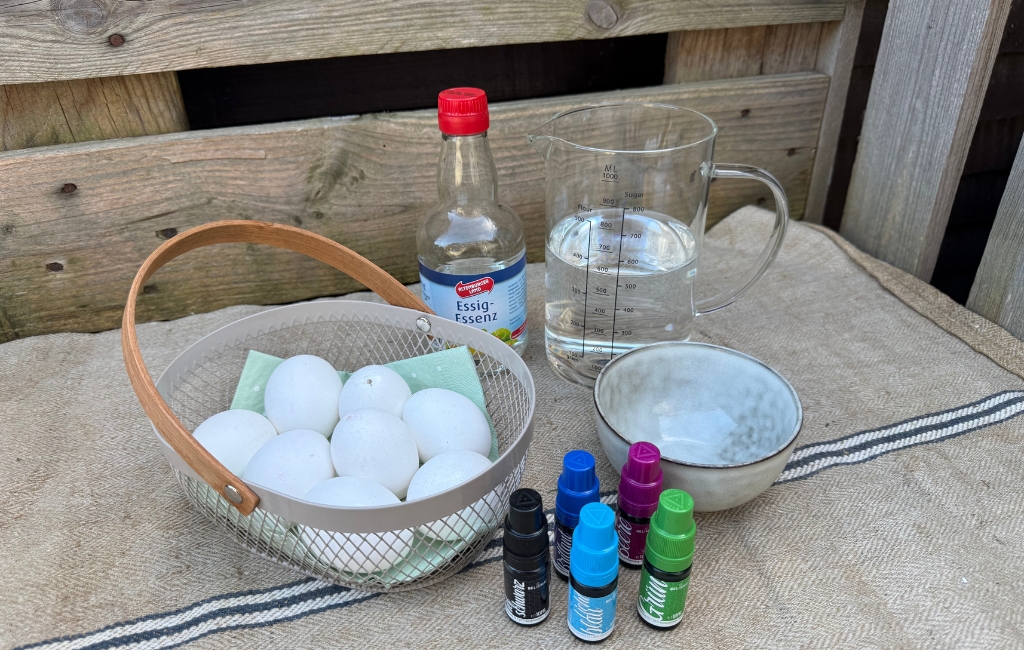
Tools and materials
Material
- fresh, flexible branches (e.g. willow or birch)
- wire
- pruning shears
- tape
- eggs for colouring
- food colouring
- decorative items such as moss, twigs, spring flowers, feathers and other natural materials as desired
Step-by-step instructions:
Step 1: Collect and prepare branches
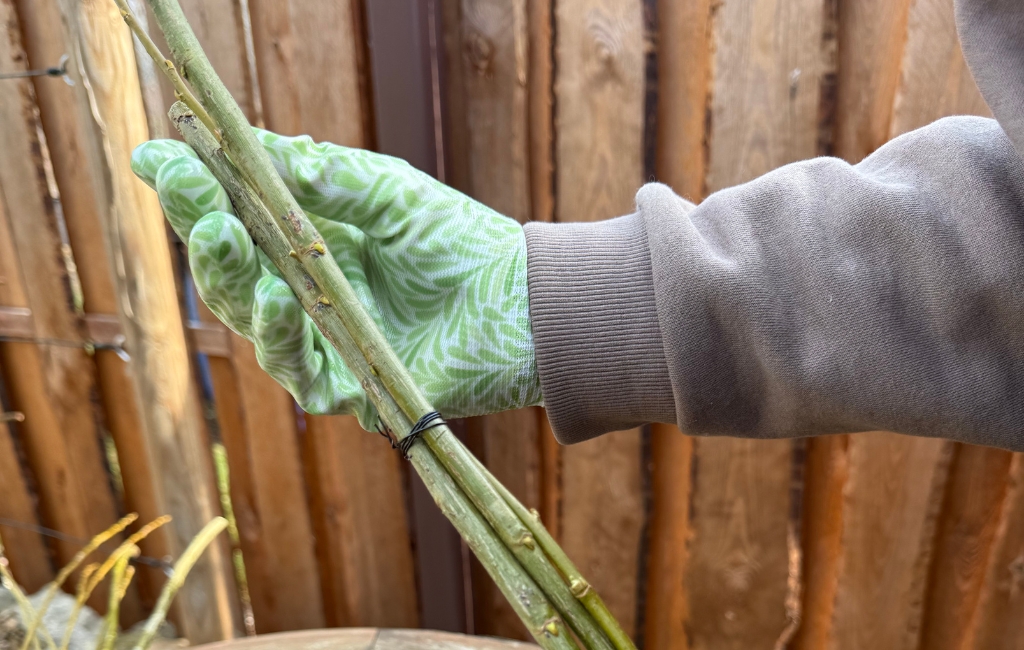
First, cut some fresh, preferably flexible branches in the garden or during a walk. Cordless pruning shears are ideal for this, as they make it easy to cut even thicker branches. The branches should be roughly the same length. Depending on the desired size of the wreath, a length of at least one meter is recommended.

Step 2: Tie the egg shape
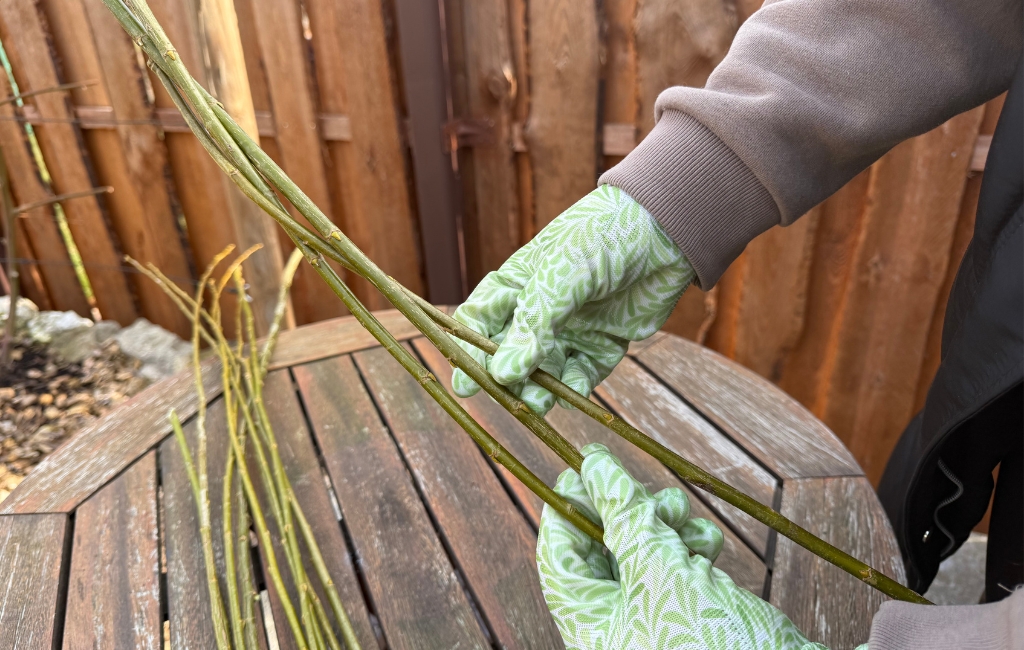
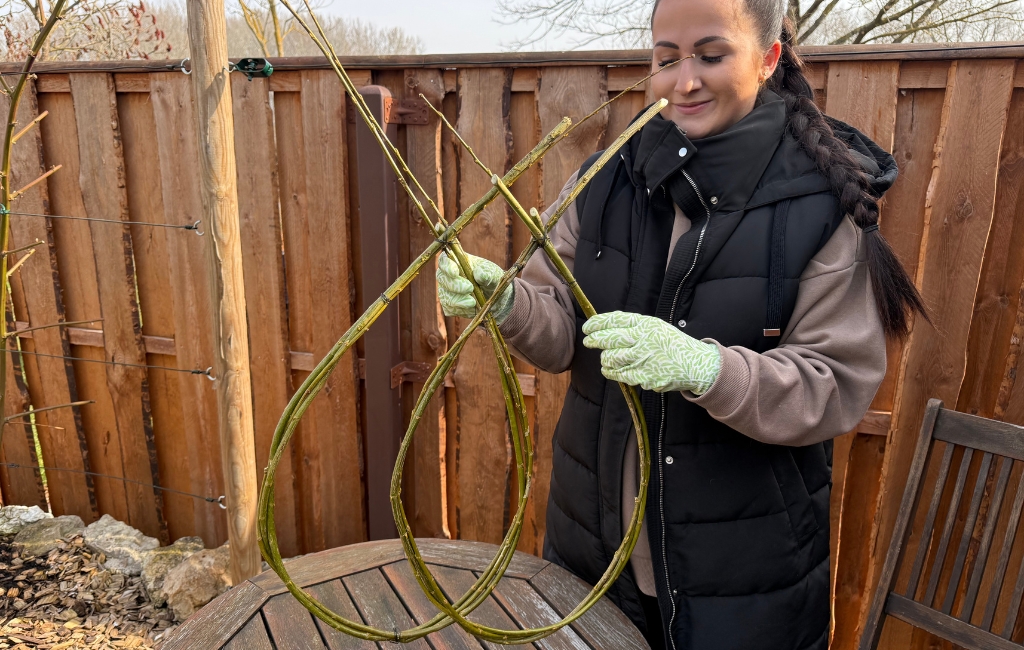
Now take three branches and place them on top of each other in different directions. Tie one end together using wire. The branches can now be braided easily. Tip: When braiding, work slowly and loosely. Gentle movements make the branches flexible and prevent them from breaking. Carefully bend the braided branches upward and secure them with wire. Depending on how thick you want the wreath to be, make two or three braided bundles of branches. Then tie these together with wire as well. This creates a decorative frame that will later form the base for your Easter decoration.
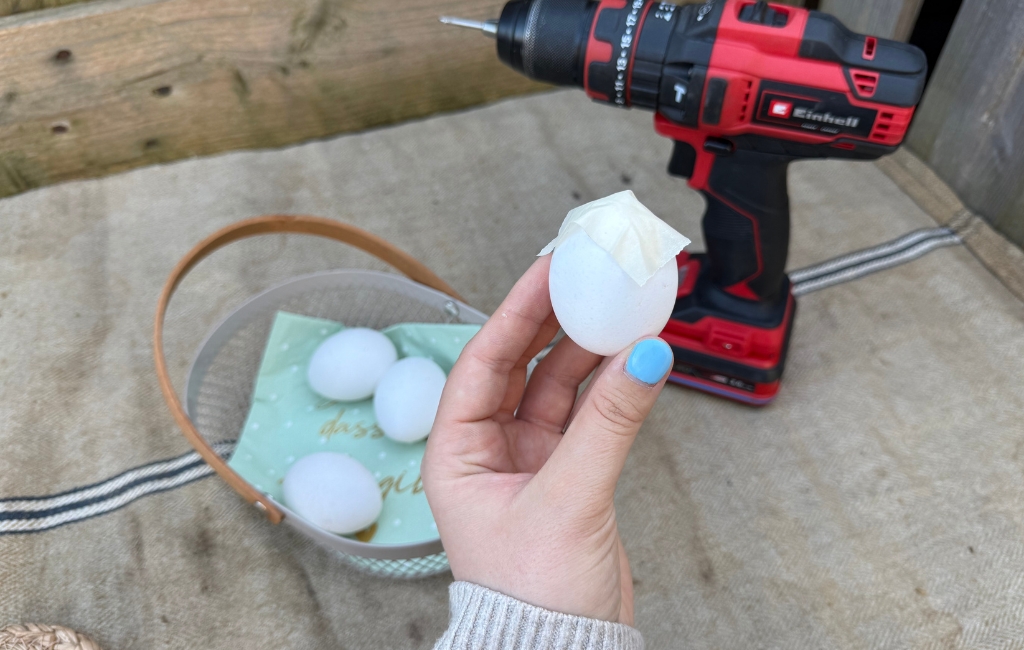
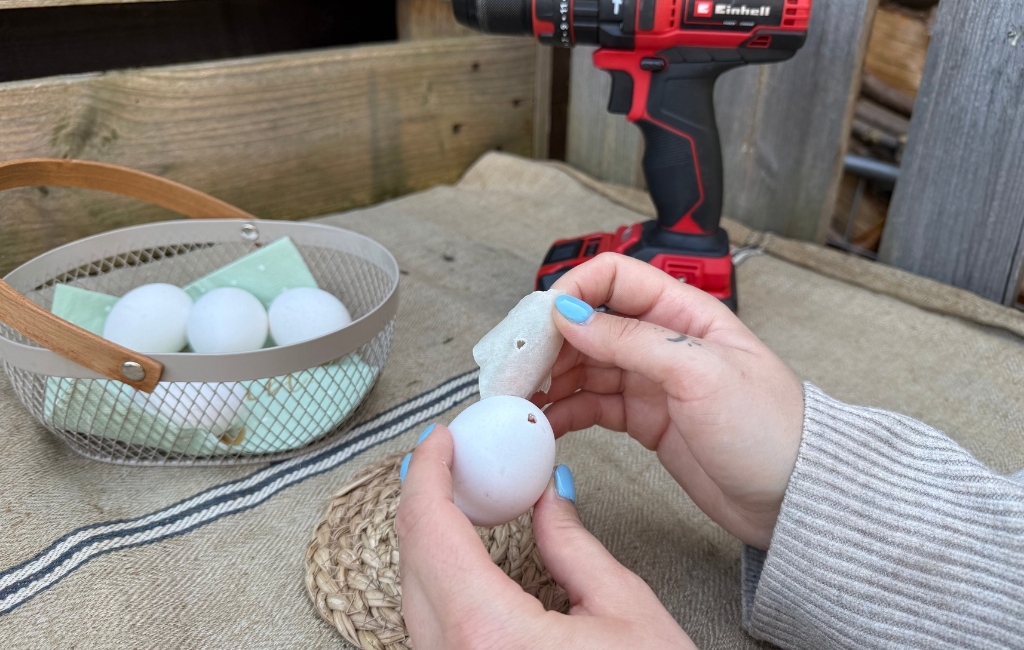
Step 3: Drill holes
It is best to use a thin tile drill bit to drill the holes. Set your cordless drill to a low speed and carefully drill into both sides of the egg without applying pressure. Tip: Stick a piece of tape over the drilling spot to prevent the shell from cracking. Work very carefully and drill slowly. Real talk: I had to figure this out first too! At the beginning my technique was not good enough and the eggs cracked. But that’s no problem, because cracked eggs can still be dyed and used. Once you get the hang of it, it becomes really fun!
Step 4: Blow out the egg
A small cordless compressor is perfect for blowing out the eggs. With about 4 bar of pressure, you can empty the eggs quickly and easily without much effort and use them right away. Make sure that the compressor nozzle is as small as possible – a bicycle valve adapter works perfectly for this.


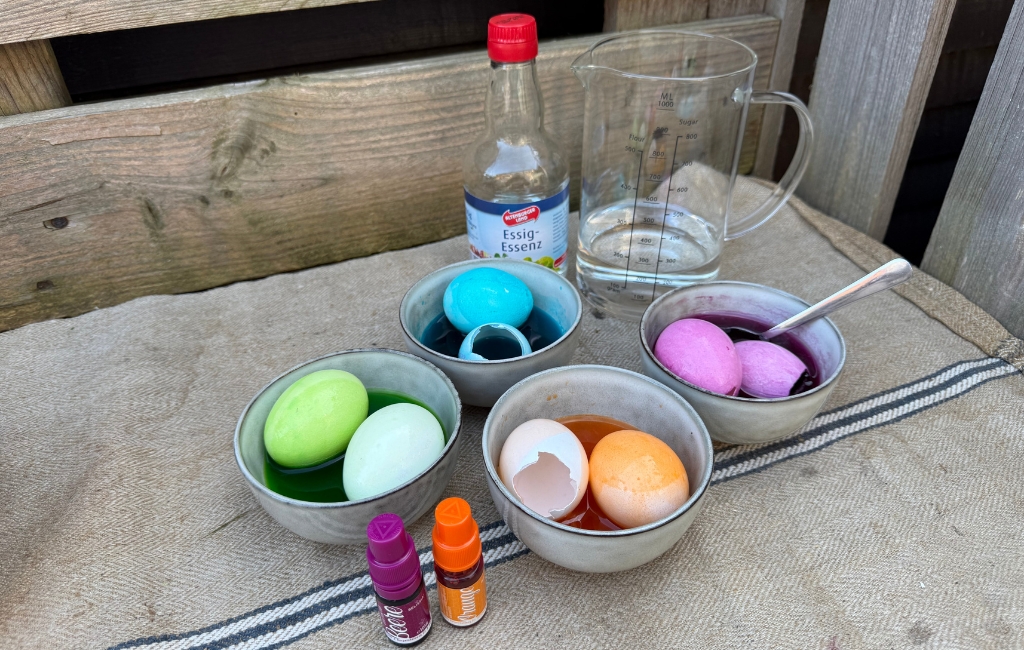
Step 5: Dye the eggs
You can easily dye the eggs using food colouring. Mix some food colouring with water and a splash of vinegar, then place the eggs in the dye for 1–2 hours. Turn the eggs regularly, and once the desired colour intensity is reached, dry them well.
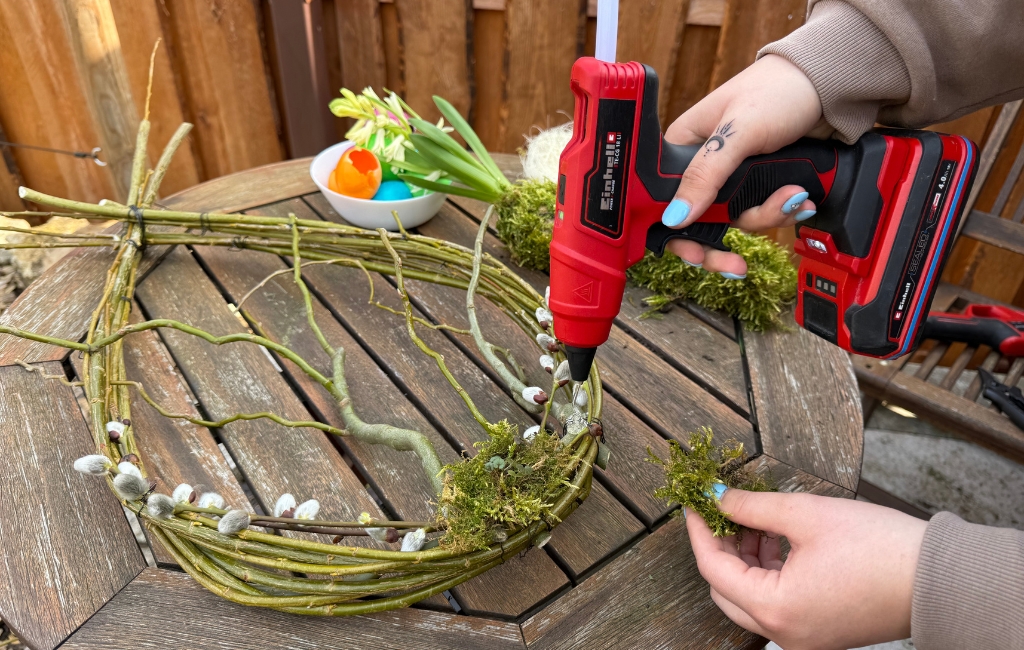
Step 6: Decorate
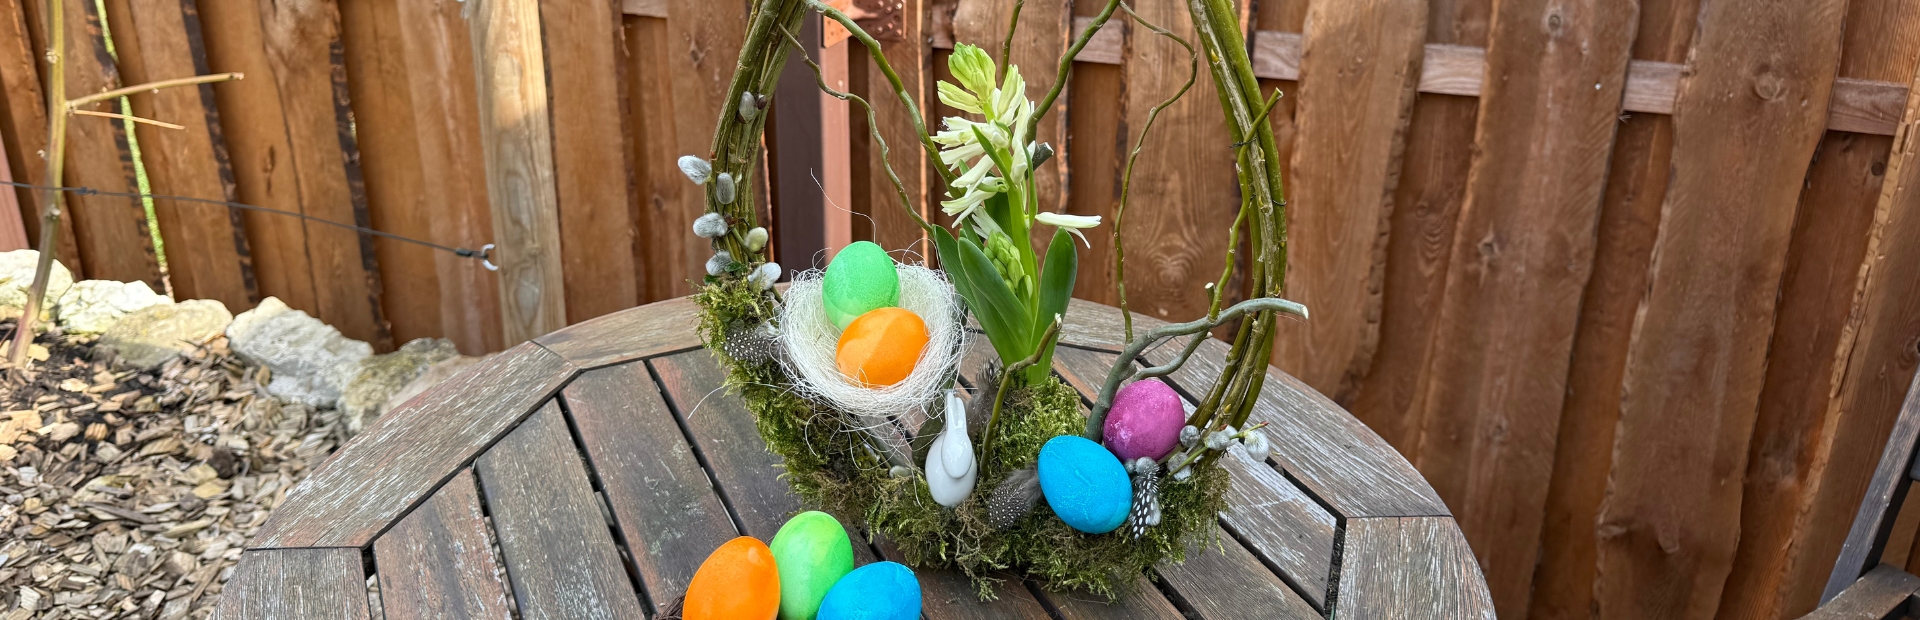
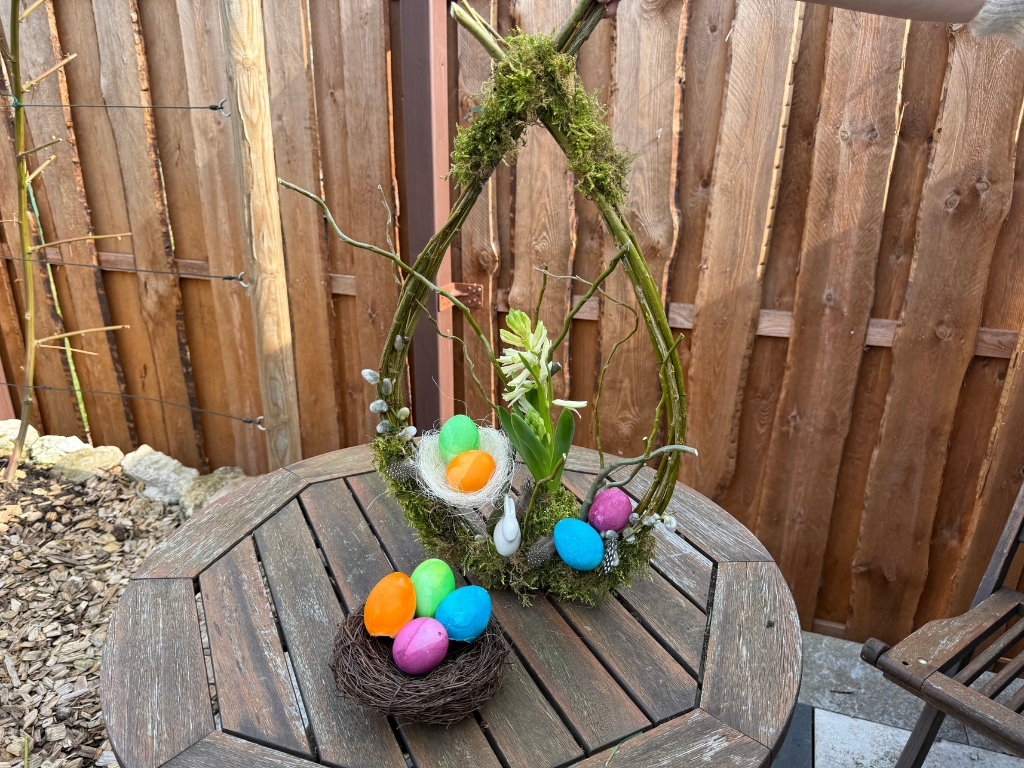
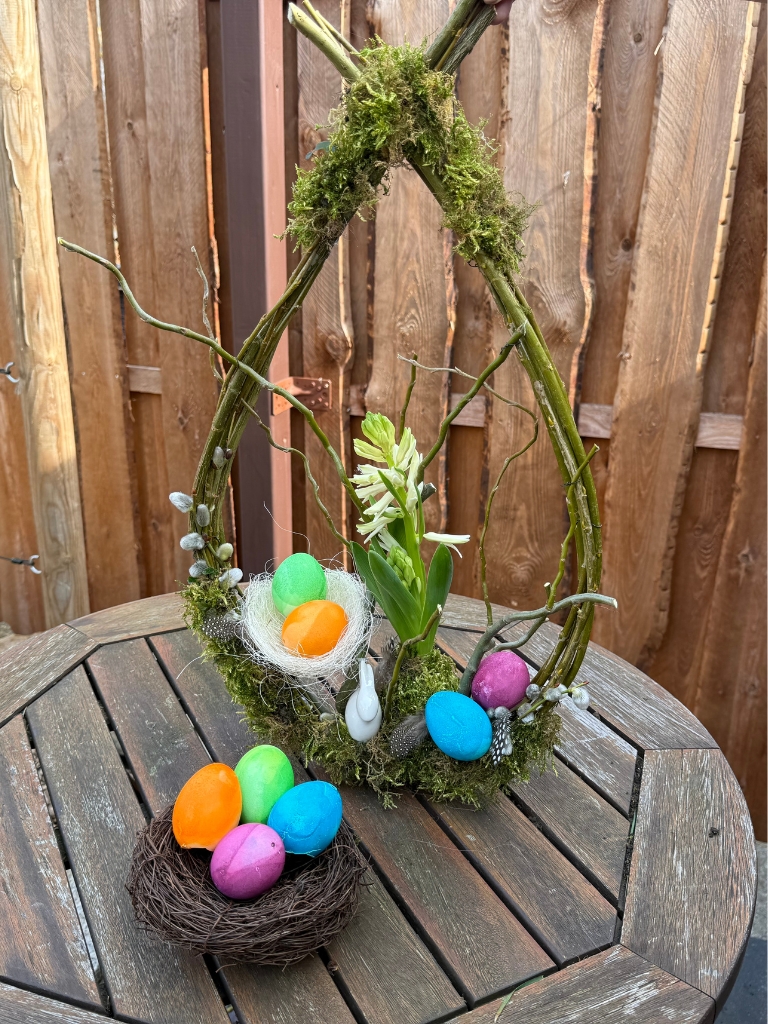
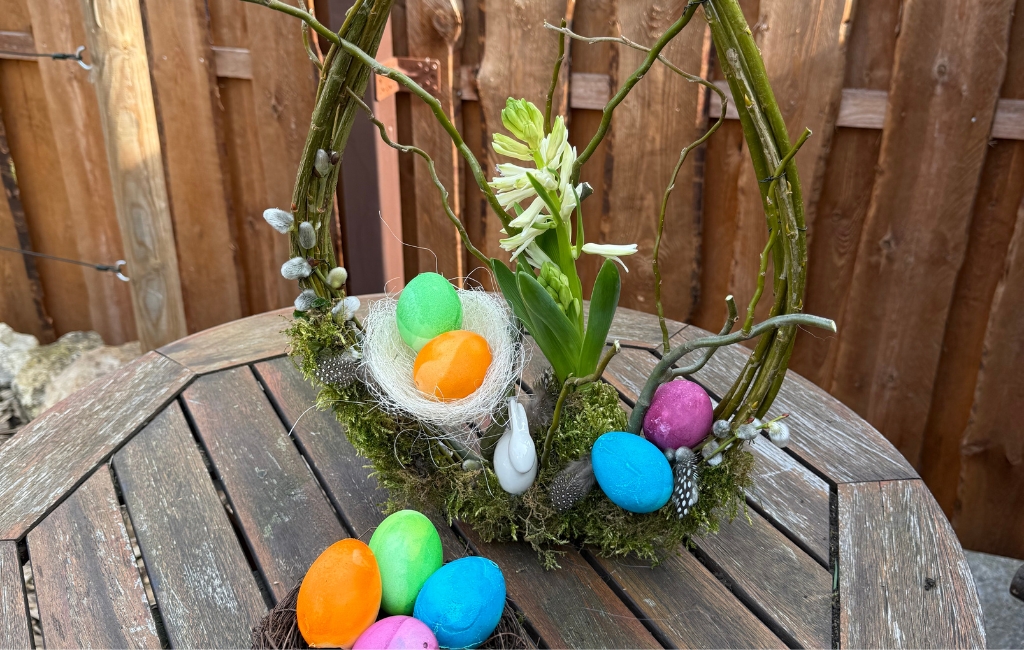
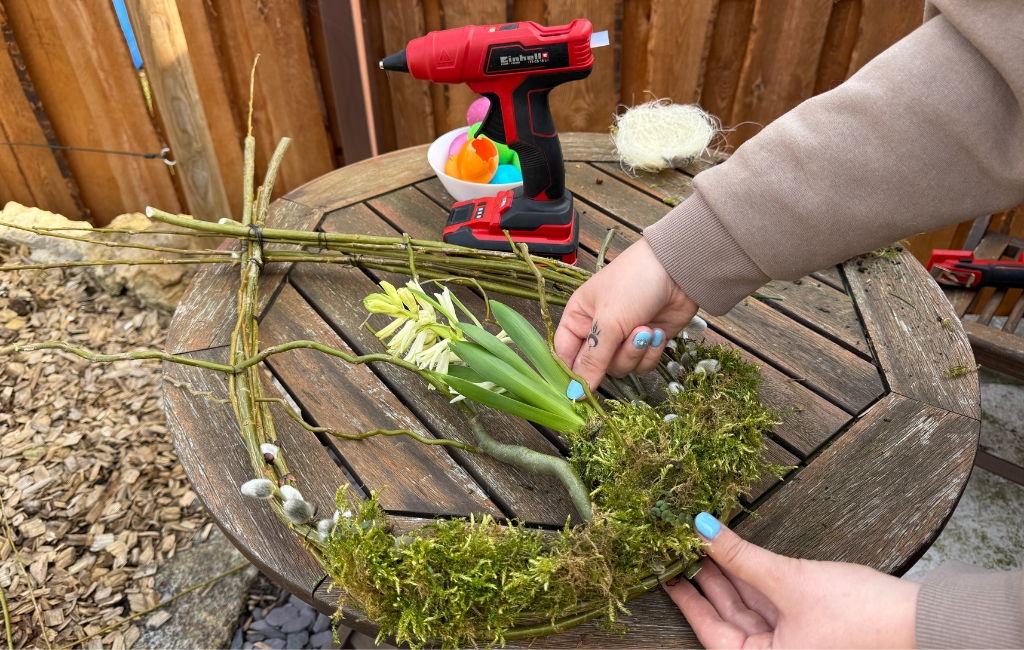
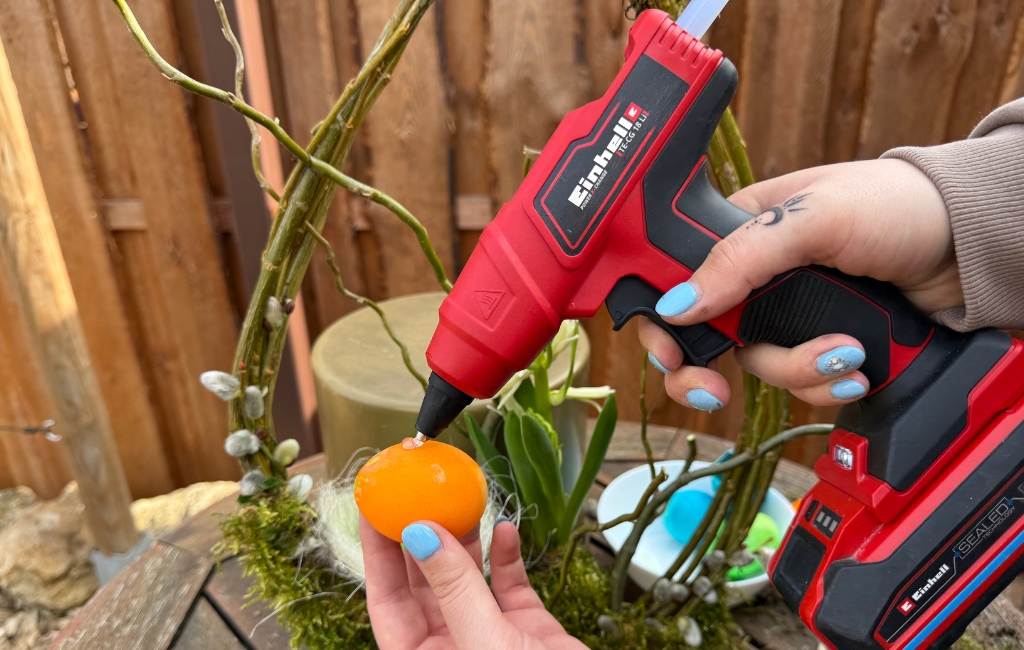
Decorating is always my favourite part! First, attach moss to the edge of the wreath. To keep the beautiful branches visible, I recommend not covering the whole wreath, but only gluing moss in certain places. Something fresh, such as a hyacinth, is also perfect to give the wreath a pleasant freshness and a lovely scent. Fix the hyacinth in a way that allows you to replace it after it has faded. To match the Easter theme, a small Easter nest can also be placed in the wreath. You can either make it yourself from thin twigs or from coconut fibres. Then place the colourful Easter eggs in and around the nest. As always, there are no limits to creativity. Every wreath can be designed individually and uniquely using any decorative items you like.
Final thoughts
An Easter wreath is always something special, but a completely handmade one is even better. This colourful Easter wreath brings spring feelings and invites you to get creative yourself. Whether on the garden table, the patio, or on the door – this DIY decoration is sure to bring Easter joy into your home.
Suitable Tools for the Project


In this article you will learn all about:

Published on 23.03.2026
A love of decoration meets creativity – Julia from @julias_deko_home delights with heartfelt DIY ideas for the home and garden, inspiring others to get creative themselves. On her channel, she shares inspiring decor ideas and seasonal arrangements that bring warmth and cosiness to any home. With a keen eye for detail, she combines modern trends with timeless elegance. The result is a home that not only looks beautiful but also feels truly welcoming.