


In this article you will learn all about:
Tools and materials
Materials
- Cardboard
- Pencil for marking out the floor plan
- Black chalkboard paint
- Artificial grass
- Your favourite snacks
Step-by-Step Guide
Step 1: Draw the Floor Plans on Cardboard
First, draw the outlines of all the pieces you will need onto the cardboard. These include the base of the snack box, the side walls and the internal dividers. The base measures 60 cm x 35 cm. For the side walls, you will need one piece measuring 17.5 cm x 80 cm. Next, mark out the dividers that will later be used to section off the box: the vertical dividers measure 35 cm x 17.5 cm, while the horizontal dividers measure 60 cm x 15 cm.
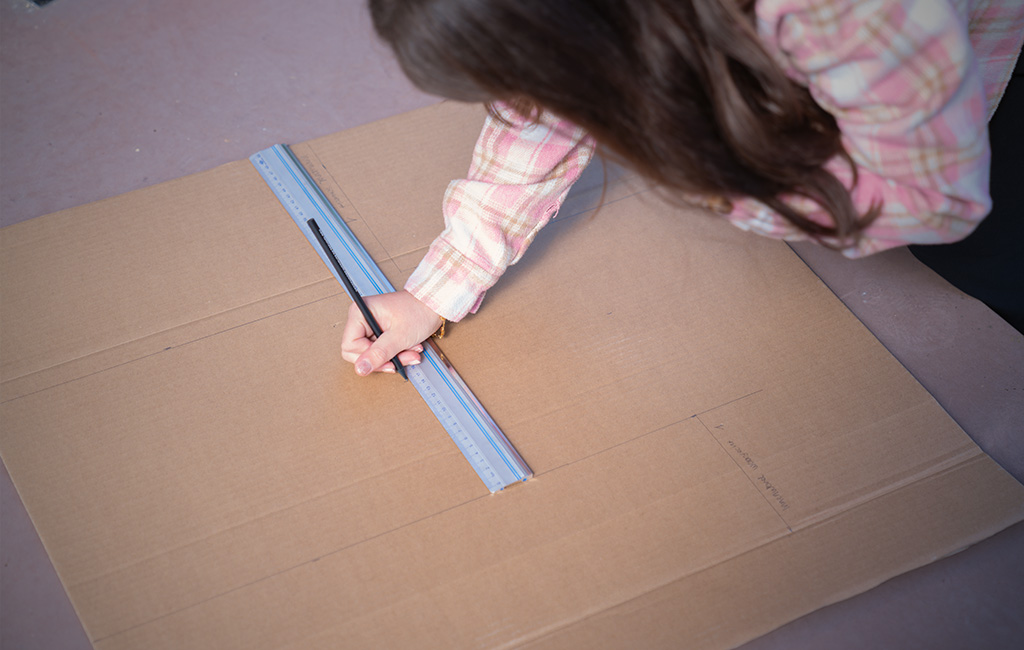
- Tip: A sketch can help you arrange the individual pieces clearly and double-check the measurements before cutting them out.
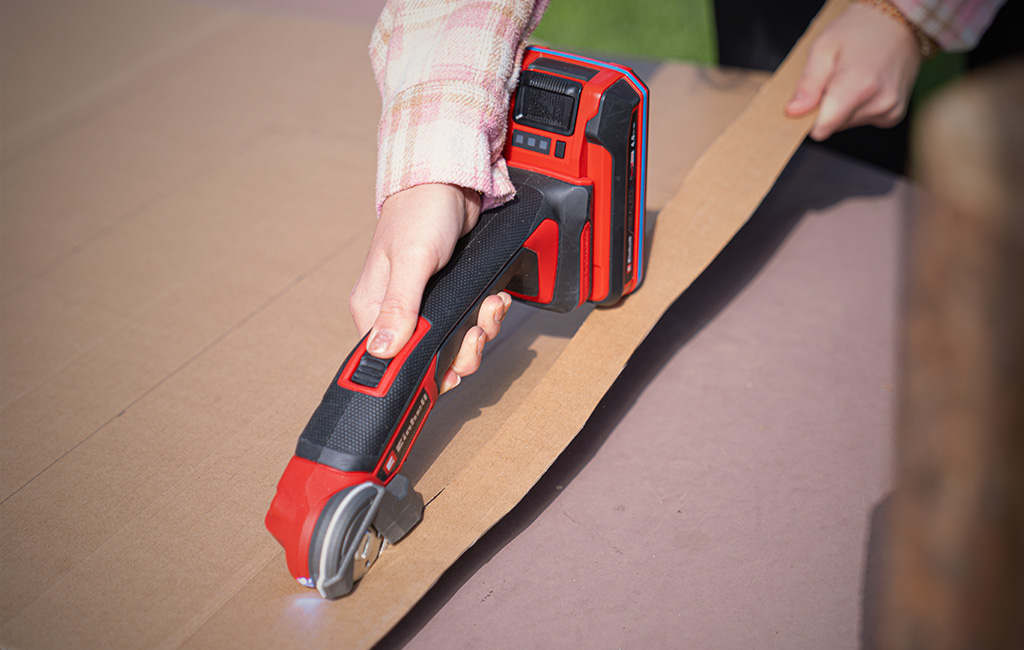
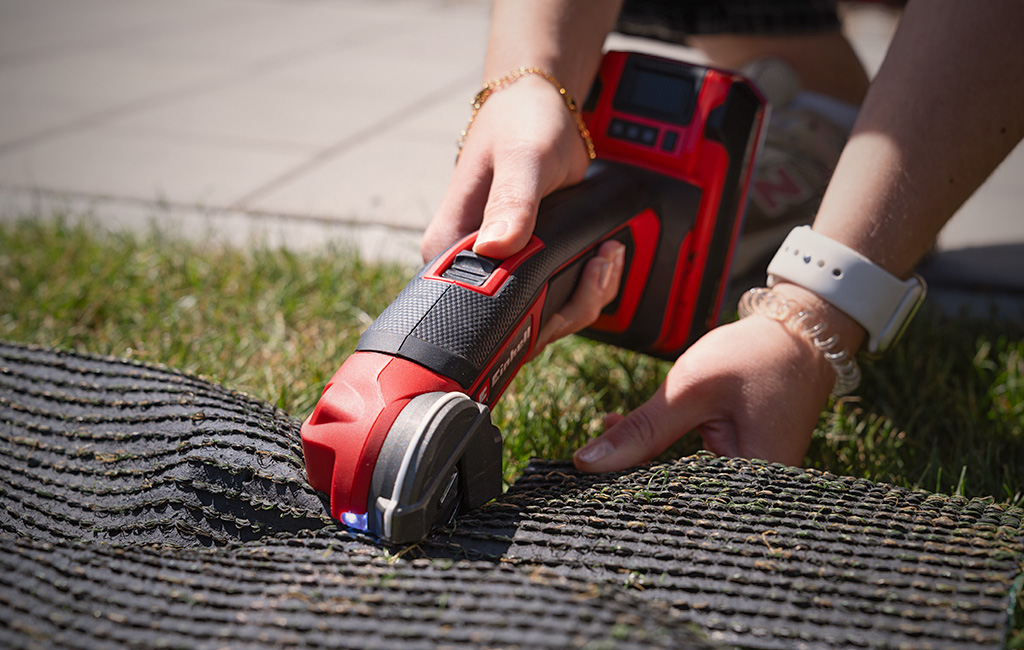
Step 2: Cut Out the Individual Pieces
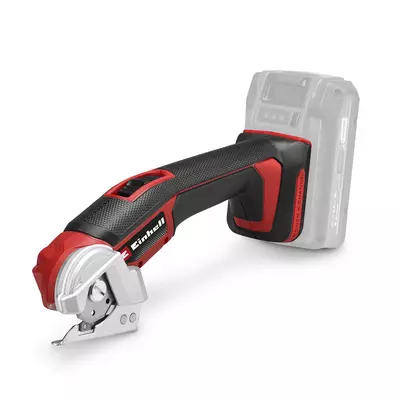
Next, carefully cut out all the marked pieces along the lines you have drawn. Einhell’s universal cutter is particularly well suited to creating clean, precise lines. Take your time and work carefully so that the individual elements can be assembled easily later on.
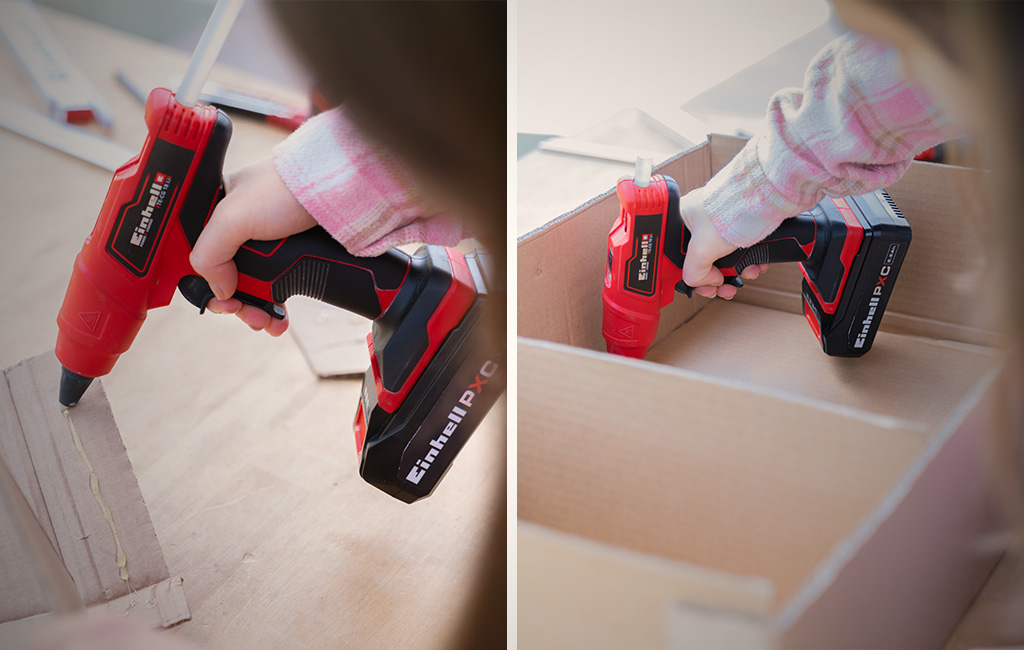
Step 3: Glue the Snack Box Together
In the next step, fold and assemble the snack box. First, fold the base upwards 15 cm in from both the left and right sides. This creates the outer side walls of the box. Then fold the bottom 2.5 cm of the side walls inwards. Next, fold the side walls 15 cm in from each outer edge so that they can later be fitted neatly to the base and sides of the box.
For the vertical dividers, fold over a 2.5 cm-wide strip on each one. This creates a tab that you can later use to attach the dividers to the base of the snack box. Cut the horizontal dividers almost halfway through at the points where you want them to slot together. Make matching cuts in the vertical dividers as well. This will allow you to slot the dividers together easily later on, creating a sturdy grid inside the box.
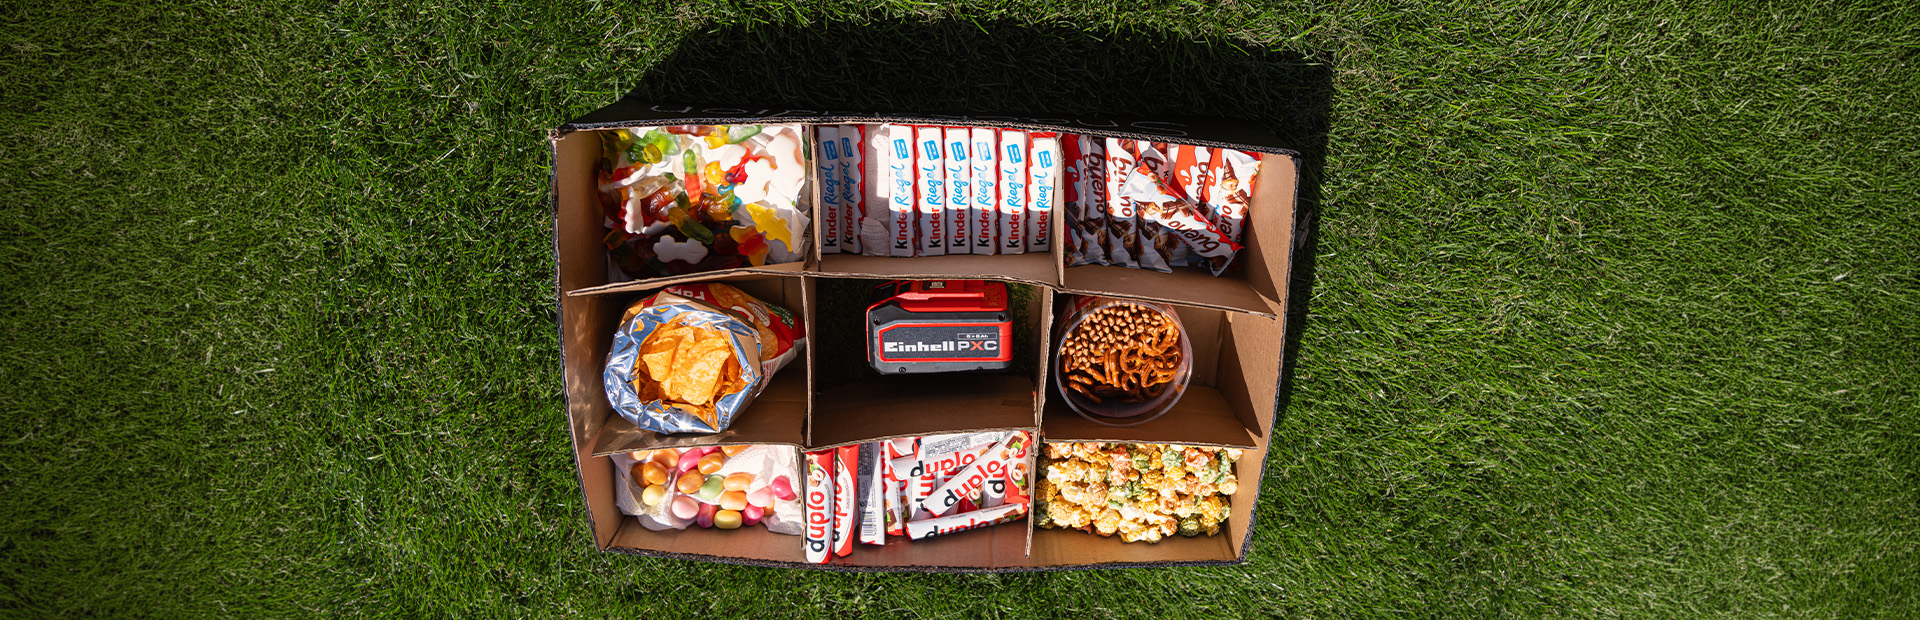
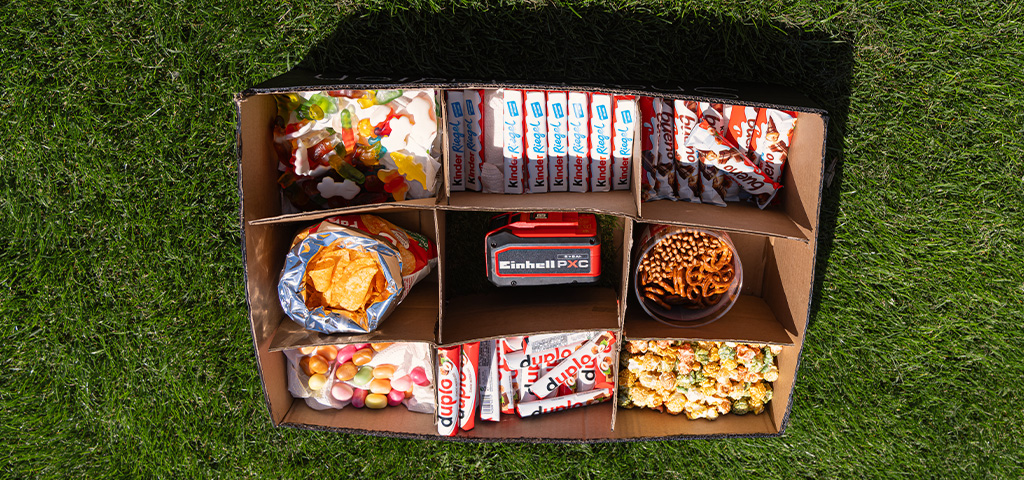
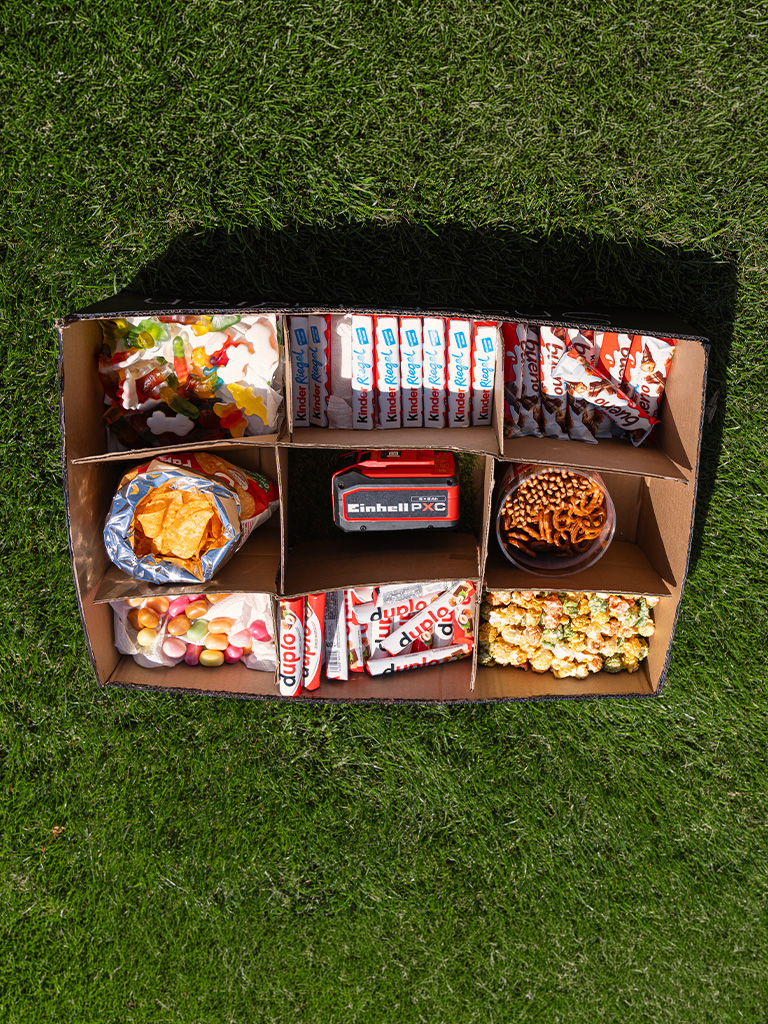
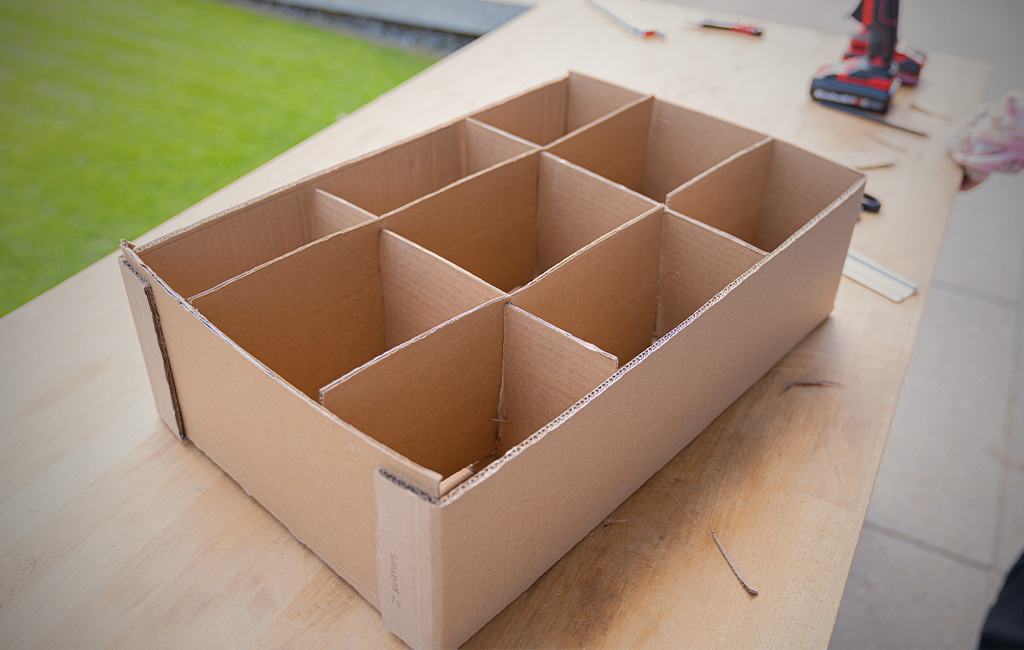
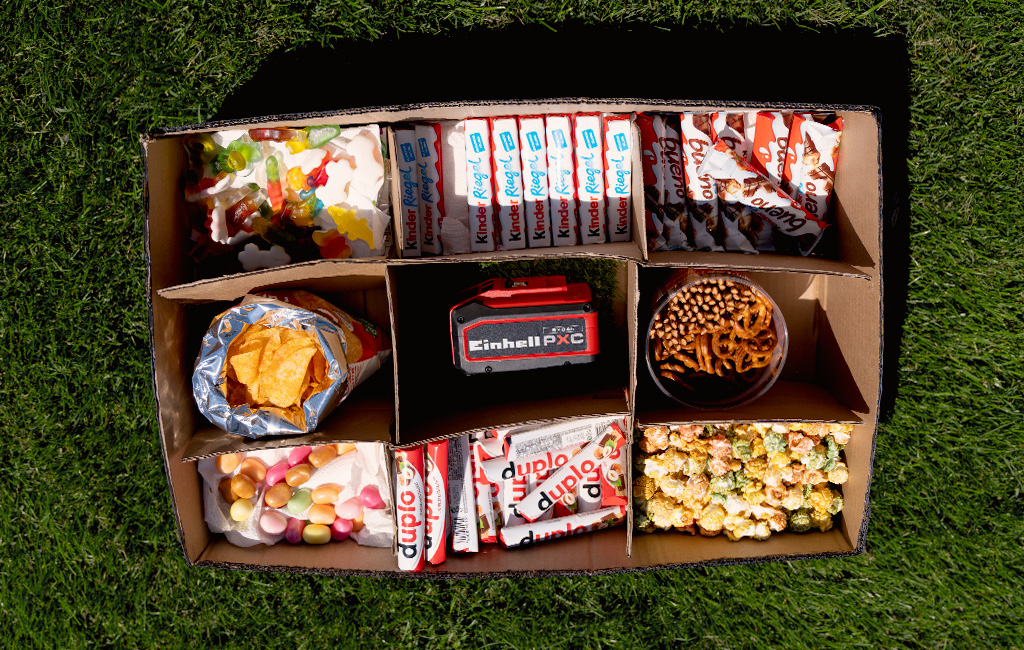
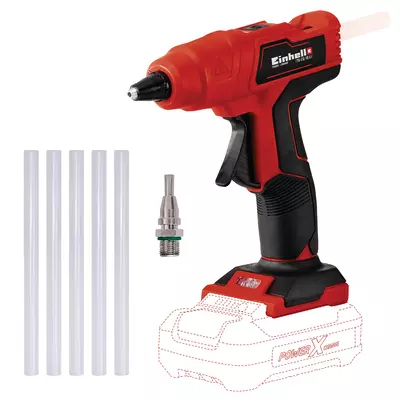
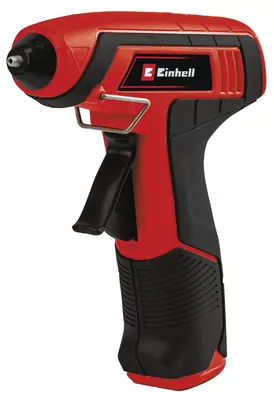
Now assemble all the pieces using a hot glue gun. First, glue the side walls to the base and sides along the folded tabs. Then attach the vertical dividers to the base of the box using their tabs. Finally, slot the horizontal dividers into the prepared cuts. This creates nine compartments, which you can later fill with different snacks.
Step 4: Paint the Snack Box
Once the snack box is fully assembled, you can paint the outside with black chalkboard paint. Apply the paint evenly and then leave it to dry thoroughly. The chalkboard paint not only gives the box an attractive finish, but also allows you to write on it easily with chalk later on.
Step 5: Cut Out the Artificial Grass
Next, cut a suitable piece of artificial grass for the middle compartment of the snack box. Measure the size of the central section and cut the artificial grass to fit. Try to work as neatly as possible so that the piece fits exactly into the compartment later on and creates a decorative eye-catcher in the centre of the snack box.
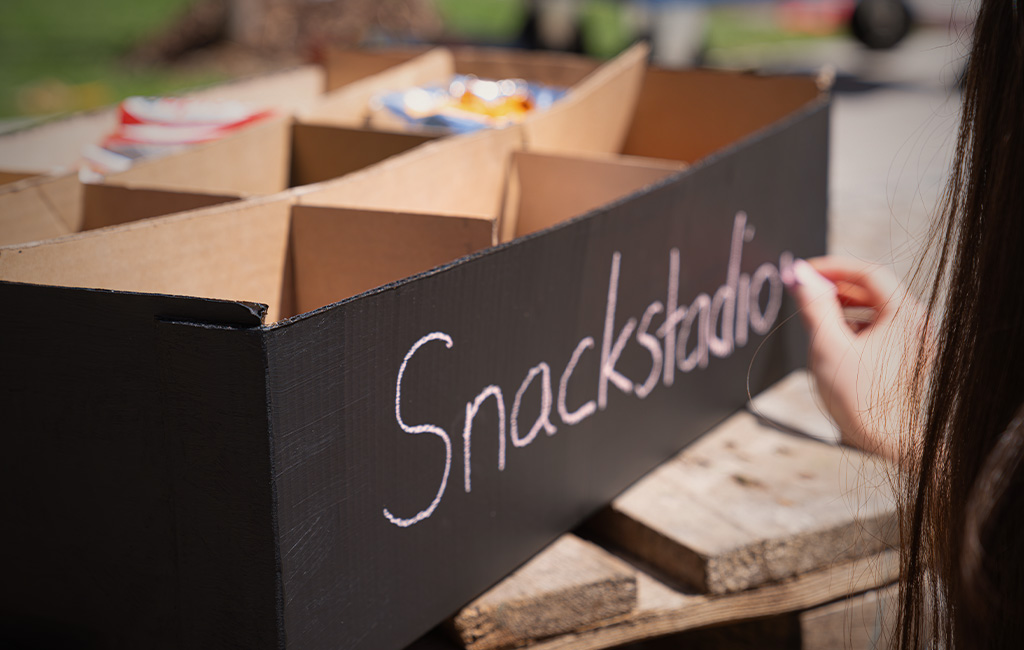
Step 6: Label the Snack Box
Now you can label and decorate your snack box however you like. As my snack box was designed to be a highlight for the Football World Cup, I chose the wording “Snack Stadium”. Thanks to the chalkboard paint, you can simply write on it with chalk and change the lettering at any time if needed.
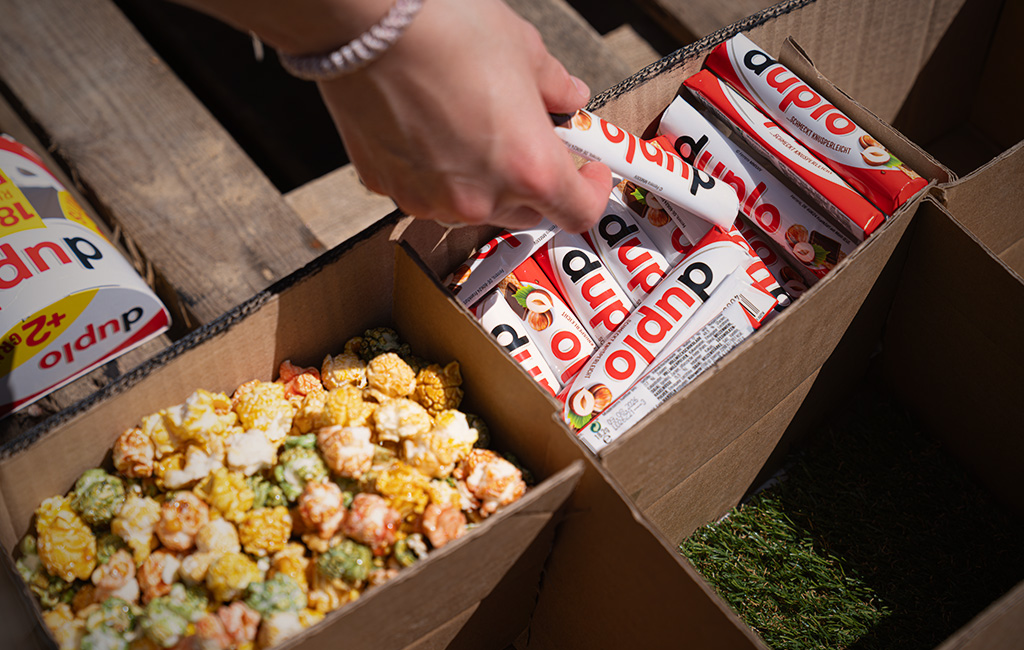
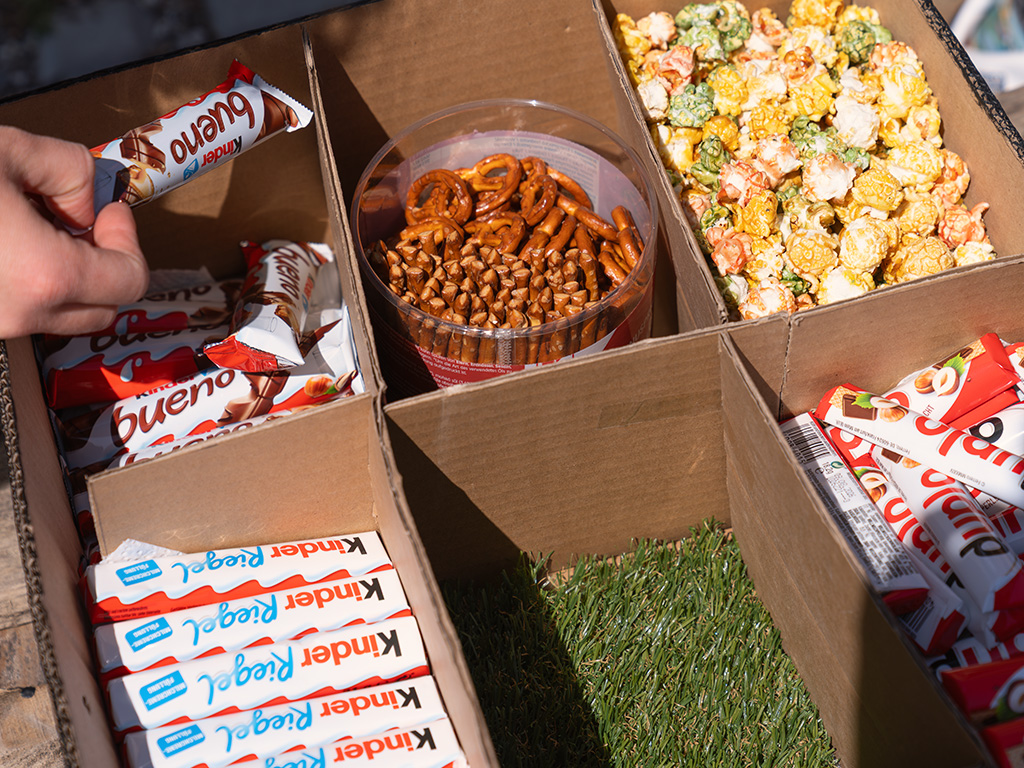
Step 7: Fill the Snack Box
Now comes the best part: filling it! Buy your favourite snacks and fill your box however you like. Whether it’s sweet chocolate bars, salty nuts or fruity wine gums, mix together your perfect match-day snack selection.
Kick-off for snack time!
And there you have it – your very own snack stadium! Now you’re perfectly equipped for your next public viewing evening. Grab your friends, put the match on and enjoy the stadium atmosphere from the comfort of your own living room.
Even if some teams no longer have a chance of winning the 2026 World Cup, the snack box is always a winner!
Suitable Tools for the Project

Published on 30.06.2026
Laura Wallner works in online marketing at Einhell and deals with creative content on a daily basis. She loves doing crafts – from upcycling projects up to seasonal decorations. Her motto is: learning by doing. That’s why she likes to allow for a bit of leeway when working with materials like Wood. Her essential Einhell tool is the USB cordless battery adapter for charging her mobile phone – so she never runs out of battery whilst crafting, whether she’s using it for online instructions or music.